I love to use these for visuals! These Tri-Fold cardboard backgrounds are also known as a Science Board or Project Display. They are pretty cheap, especially when you use a coupon (Hobby Lobby, etc.) and so easy to store. They can be used on a table or on the floor depending on the class.
There are some new ones posted here and some older ones in case you missed them.
I did not know I used so many of them until I searched for the pictures!
I did not know I used so many of them until I searched for the pictures!
You can click on the post beside the visual aid to see more and download the printables.
I used this for preschool for Daniel and the Lion's Den. This display is what made me want to share these in their own post. I used this on the floor so it would be on the preschoolers level. I cut a project display (science) board in half and I used the Cobblestone background paper to cover it front and back. I printed an extra Daniel and King Darius from the printable on the post above. I poked a hole in the center of the fold and inserted string (knotted at the end inside) in Daniel to lift him up and down and around the lion's den. I found the lions at Dollar Tree. The students picked a lion to take home. (You can see this post Nov. 17, 2017)
Using the same idea above with project display (science) board cut in half and the Cobblestone background paper to cover it on the front and back, this can transform into a nice prison visual for Paul, Peter and more lessons. I purchased necklace chains and used wire to attach them to the 'wall'.
(Not shown in this photo.)
(Not shown in this photo.)
I made this lighted night sky for this lesson from a science board, purchased with the blue background. I spray painted the bottom with the Krylon Make It Stone! textured paint. I used the Travertine Tan color. I glued the scripture topper to the board. Then, I added the light bulbs (35 in a craft pack, but suggest the 50 set purchased during Christmas to be cheaper). I used yellow paint and a Q-Tip to add the stars, then I used different glitter glue to make dots to add the shine & sparkle! To finish it, I used a sand color felt for the ground, and I used my Moses (I don't have Abraham) to stand.
For Jacob's Ladder, I used a blue Tri-Fold Science Board for the background. I painted the stars and grass. I used Balsa wood sticks (1/8 x 1/2 36") to make the ladder. Then I used the angel patterns in the download to cut the angels from black cardstock. I used felt for the grass and my David doll. I added stones and 'brown felt blanket'. The stone for Jacob's pillow is a longer one with a flat bottom that I stood up to show Jacob turning it into a pillar and anointing it.
Every time I have used this visual to teach the Sons of Jacob vs. the 12 Tribes of Israel, the students have understood who they were and what the differences were. I used a thicker Tri-Fold board for this one and attached an envelope on the back to store the extra pieces. You can see more here.


I used this science board for Ruth. You can use the printables as I did, for a science board, or you can make a bulletin board or magnetic board. As a visual board, I used sticky Velcro to attach the pieces so I could remove and add the people. This will show all the people and their spouses. Add and remove people as they are during the lesson.
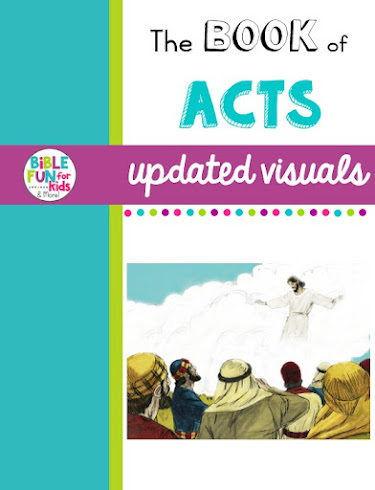
I wanted Jesus returning to Heaven where He is now with God His Father. I used the blue background Tri-Fold. I added string for the belt to make Jesus more dimensional.
As you can see from the above photo, I printed everything, cut it out and laid it out to see how I wanted it. I cut a piece of 12x12 cardstock into 4 pieces, cut the tops out like waves, and used a Sharpie to add the waves. I printed the sun onto yellow cardstock, and just glued the base down so I could slightly bend the sun ray out. I also purchased the project board header. It has a dark blue side and the light blue side. I trimmed the side with the notches to look like waves and used a Sharpie to add the waves. I attached it at the bottom at a slant. John can be already on the board, or you can add him as you do the lesson. I just used masking tape rolled sticky side out to add Jesus, John and the dove. I wanted Jesus to be able to be removed to go down into the water and lay sideways so the kids can't see Him, then add Him back to the board. I added the dove the same way at the correct time. If you do not want to buy the header, or can't find one, you can just use blue bulletin board paper.
I used a blue Tri-Fold board and laid the men on the grass and made a painted a path for them to walk from Jerusalem to Damascus. Your option here is to Velcro Saul standing with these men, then remove that piece and add Saul kneeling under the light at the correct time. I just glued Saul kneeling under the light.
This is the visual aid I made for Paul Leaving Damascus at night. (I have used two different style baskets.) I used a white science trifold, added the top with cardboard, and covered the whole project with gray bulletin board paper. I painted the windows and door. I tried to make a simple version of the photos of the real wall. Even though Saul was let down out of a window, I have him from the top because of the weight of him in the basket. I discussed this with the kids so they know. 2 Cor. 11:33
I had a white tri-fold science board and drew out the clouds and the water line. I used a lighter blue to paint the sky and left the clouds white. Then, I used a darker blue for the water. This was so easy, my 3 year old granddaughter helped paint the water! And she had FUN! Once the paint was dry, I laid out the lighthouses and the boats where I wanted them and painted the white caps on the water.
I cut the title with my Cricut using Simply Sweet at 5". I glued the boats with Aleene's Tacky Glue and put the seagulls through my sticker maker. I attached the lighthouses with sticky Velcro so I could add/remove them during the lesson.






No comments
Thanks so much for taking the time to comment! I appreciate it! They will be added as soon as they are approved.